2025 Australian Photographic Prize — Full Image Breakdown Series

Headland Light and Motion — How It Earned a Highly Commended at the 2025 APP

Headland Light & Motion — How It Earned a Highly Commended at the 2025 Australian Photographic Prize

Golden sunrise light over coastal headland with foreground wave motion – Highly Commended, 2025 Australian Photographic Prize, Landscape Category
Award: Highly Commended  |  Category: Landscape  |  Final Score: 75
Submitted: 22 June 2025  |  Location: Coastal headland, Queensland

Story Behind the Shot

Warm light kisses the headland while incoming waves rush the lens. Aim: balance landmark, light, and motion in one cohesive frame.

Why It Scored Well

  • Golden side-light creates a clear focal anchor.
  • Leading water motion pulls the viewer into scene.
  • Good vertical balance between sky, land, water.

Where It Could Improve

  • White-water highlights verge on clipping; blend to retain texture.
  • Cloud structure pleasant but not dramatic; impacts overall “wow”.
  • Mild haze softens headland micro-contrast; CPL/clarity could help.

Lessons

  • Expose for whites in surf; recover shadows later.
  • Plan for days when sky and foreground both peak.
  • Use polarisation to manage glare and haze.

Return to the series hubSee upcoming dates.

Forest Isolation — How It Earned a Highly Commended at the 2025 APP

Forest Isolation — How It Earned a Highly Commended at the 2025 Australian Photographic Prize

Minimalist forest scene with single green sapling among dark pine trunks – Highly Commended, 2025 Australian Photographic Prize, Nature Category
Award: Highly Commended  |  Category: Nature  |  Final Score: 75
Submitted: 22 June 2025  |  Location: Plantation forest, Southeast Queensland

Story Behind the Shot

A lone sapling punctuates a grid of charred trunks—an exercise in minimalism, contrast, and restraint.

Why It Scored Well

  • Clear subject isolation; strong visual hierarchy.
  • Rich greens vs deep blacks create graphic punch.
  • Orderly geometry suits minimalist Nature work.

Where It Could Improve

  • Light is a little flat; angled side-light would add depth.
  • Micro-verticals could be refined for absolute symmetry.
  • Selective tonal separation in mid-ground to enhance depth.

Lessons

  • Minimalism thrives on perfect alignment—check your verticals.
  • Subtle dodging can guide the eye without breaking realism.
  • Return when light cuts across trunks for texture.

Browse the series hubJoin a landscape workshop.

Coastal Drama at Sunrise — How It Earned a Highly Commended at the 2025 APP

Coastal Drama at Sunrise — How It Earned a Highly Commended at the 2025 Australian Photographic Prize

Black and white photograph of ocean wave breaking with dramatic spray – Highly Commended, 2025 Australian Photographic Prize, Nature Category
Award: Highly Commended  |  Category: Nature  |  Final Score: 78
Submitted: 22 June 2025  |  Location: Exposed coastal headland, Kiama

Story Behind the Shot

A sculptural breaker against a dark horizon. Intent: minimalist, high-impact form with crisp spray and strong tonal separation.

Why It Scored Well

  • Excellent timing—peak action frozen at maximum shape.
  • Powerful contrast; negative space isolates the subject.
  • Clean presentation suits the Nature category’s emphasis on authenticity.

Where It Could Improve

  • Spray tips show slight motion softness; faster shutter could help.
  • Shadow mid-tones a touch compressed; modest lift may reveal texture.
  • Side-light at a lower sun angle might add micro-contrast to spray.

Lessons

  • Study wave sets; pre-focus and commit to the decisive moment.
  • Dark backgrounds amplify shape—compose for separation.
  • Test 1/1000–1/4000s to find your ideal spray texture.

Read the series hub or join a seascape workshop.

Tidal Flow and Morning Glow — How It Earned a Highly Commended at the 2025 APP

Tidal Flow & Morning Glow — How It Earned a Highly Commended at the 2025 Australian Photographic Prize

Seascape at sunrise with flowing tidal water over rocks – Highly Commended, 2025 Australian Photographic Prize, Landscape Category
Award: Highly Commended  |  Category: Landscape  |  Final Score: 77
Submitted: 22 June 2025  |  Location: Rugged coastline, Eastern Australia

Story Behind the Shot

Pastel dawn sky meets surging flow across jagged rock. Objective: keep movement alive without losing texture or highlight detail.

Why It Scored Well

  • Compelling lead-in lines; water flow drives the eye.
  • Warm sky hues play against cool water—pleasing colour contrast.
  • Good timing on shutter for streak texture.

Where It Could Improve

  • Slight edge softness in extreme foreground; micro-focus adjust or faster shutter.
  • Some highlight streaks approach clipping; blend/bracket to protect whites.
  • Sky structure is gentle; higher drama could lift impact score.

Lessons

  • Use graduated ND or bracket for flow highlights.
  • Angle for side-light to enhance foreground texture.
  • Revisit when sky energy matches a strong foreground.

See the series hubBook a seascape session.

Remote Waterfall Nightscape — How It Earned Silver at the 2025 Australian Photographic Prize

Remote Waterfall Nightscape — How It Earned Silver at the 2025 Australian Photographic Prize

Nightscape of waterfall under Milky Way – Silver Award, 2025 Australian Photographic Prize, Photographic Artist Category
Award: Silver  |  Category: Photographic Artist  |  Final Score: 83
Submitted: 22 June 2025  |  Location: Remote waterfall, Northern Australia

Story Behind the Shot

Clear, moonless conditions with the Milky Way arcing above a cascading fall. Goal: pair dynamic water texture with crisp stars for a moody, painterly nightscape.

Why It Scored Well

  • Balanced composition guiding the eye from foreground flow to galactic core.
  • Exposure control across extreme dynamic range; stars remain detailed.
  • Creative cohesion suited to Photographic Artist—strong narrative and atmosphere.

Where It Could Improve

  • Very slight star elongation at 100%; shorter shutter or tracker would lift technical score.
  • Minor highlight clipping in lower cascades.
  • Shadow detail in foreground could be lifted subtly without noise.

Lessons for Photographers

  • Pre-plan Milky Way alignment and water levels; timing is everything.
  • Bracket or blend to balance white water and dark sky.
  • Consider tracked/stacked sky + untracked water for technical polish.

Learn more: See the full series hub here • Interested in my Nightscape workshops? View dates.

8 Best Photography Locations in Noosa National Park (Sunrise, Sunset, Astro) by Dylan Knight · Award-Winning Landscape & Astro Photographer

Why Noosa belongs on your photo bucket list

More than 1.5–2.1 million visitors explore Noosa National Park each year, yet photographers still find quiet pockets of raw coastal beauty. West-facing headlands meet east-facing coves, giving you sunrise, sunset and Milky Way options within one compact trail network. Add world-class surf, turquoise tidal pools and easy access from Hastings Street and you have Australia’s most versatile coastal playground.

Table of Contents

  1. Boiling Pot Lookout – Swirling Seascapes

  2. Granite Bay – West-Facing Sunset Arcs

  3. Fairy Pools – Tidal Reflections & Astro

  4. Hell’s Gates – High-Vantage Panoramas

  5. Tea Tree Bay – Golden Side-Light & Calm Water

  6. Little Cove – Pastel Dawn Classics

  7. Dolphin Point – Ocean Wildlife & Storm Drama

  8. Alexandria Bay – Remote Minimalism

  9. Planning Your Shoot

  10. Join the Workshop

1. Boiling Pot Lookout – Swirling Seascapes

Best time: Sunrise, storm swells
Gear tip: 14–24 mm lens plus 3-stop ND for 0.5 s wave blur
Safety note: Stay behind the rail; rogue waves hit at mid-tide
GPS: -26.3997, 153.0934
Insider edit: Use range mask in Lightroom to warm highlights only, preserving cool water tones.

The Boiling Pot channels incoming surf through a narrow gulley, creating explosive spray and textured water movement. Pair an east-facing glow with foreground motion for gallery-ready drama. I revisit this spot on Day 1 of my Noosa photography workshop.

2. Granite Bay – West-Facing Sunset Arcs

Best time: Sunset, Milky Way season April–August
Gear tip: 24 mm prime on a star tracker for low-noise nightscapes
Safety note: Exit before high tide, slippery boulders
GPS: -26.3941, 153.1048
Insider edit: Blend a tracked sky with a blue-hour foreground for noise-free detail.

Granite Bay is rare on the Sunshine Coast: it faces west. Expect pastel sunsets over Laguna Bay and perfect alignment for sweeping Milky Way arcs. We often finish Day 2 here on the workshop.

3. Fairy Pools – Tidal Reflections & Astro

Best time: Mid-tide for reflections, new-moon astro
Gear tip: Polariser off, ND on for mirror-flat pools
Safety note: Only enter the pools on calm days; watch set waves
GPS: -26.3946, 153.1126
Insider edit: Dodge-burn wet rocks to add dimensional contrast.

The two natural pools act as foreground mirrors at 0.8–1.1 m tide. Under clear skies the Milky Way reflects perfectly. This location features on both my multiday itinerary and private sunrise sessions.

4. Hell’s Gates – High-Vantage Panoramas

Best time: Sunrise panoramas, winter swells
Gear tip: 70–200 mm for cliff abstracts
Safety note: Strong winds at cliff edge; secure tripod
GPS: -26.3952, 153.1178
Insider edit: Stitch a three-frame pano, then add subtle dehaze on sea spray.

Hell’s Gates offers 180-degree views from Alexandria Bay round to Laguna Bay. Low winter sun lights the cliffs side-on, revealing basalt textures.

5. Tea Tree Bay – Golden Side-Light & Calm Water

Best time: Early sunrise and first light
Gear tip: 35 mm for layered pandanus trunks and shoreline curves
Safety note: Monitor tide; waves wrap quickly around rock ledge
GPS: -26.3966, 153.1019
Insider edit: Lift mid-tones selectively to reveal submerged sand ripples.

Protected from southerlies, Tea Tree delivers glassy water and amber side-light. Great for handheld composition drills before breakfast on Day 3.

6. Little Cove – Pastel Dawn Classics

Best time: Nautical dawn to sunrise
Gear tip: Use a soft-grad ND to balance horizon glow
Safety note: Steep stair access, allow extra time
GPS: -26.3940, 153.0894
Insider edit: Apply split-toning (warm highlights, cool shadows) for painterly pastels.

Little Cove’s gentle curve and pandanus silhouettes deliver textbook leading lines. Perfect for first-morning warm-ups or farewell sunrise on Day 4.

7. Dolphin Point – Ocean Wildlife & Storm Drama

Best time: Sunset, lightning season Nov–Feb
Gear tip: 70–300 mm for dolphin or cloud-burst details
Safety note: Lightning? Retreat to tree line immediately
GPS: -26.3961, 153.1008
Insider edit: Blend a lightning frame into base exposure for impact.

Expect dolphins, sea eagles and summer storm cells. We often pivot here when sky drama trumps golden light. Book a private weather-flex session here.

8. Alexandria Bay – Remote Minimalism

Best time: Astro, first light minimalism
Gear tip: 14 mm for wide astro, 50 mm for dune abstracts
Safety note: Long walk, carry headlamp, nudist beach etiquette
GPS: -26.3920, 153.1242
Insider edit: Use colour range mask to isolate warm dune tones, keep sky cool.

No lights for kilometres, pure dark-sky heaven. Perfect for tracked Milky Way rises or minimalist dune textures at dawn. We finish our final night shoot here, then head to the studio for image critique.

Planning Your Shoot

Spring and autumn offer mild temps and consistent colour. Check Sunshine Coast tide tables; aim for mid-tide at Fairy Pools, low tide at Little Cove. New moon gives Milky Way visibility between February and October. Plan using PhotoPills and pair with BOM sunrise charts.

Join the 4-Day / 3-Night Workshop

Ready to move from casual snapshots to portfolio-ready images? My Noosa National Park photography workshop is limited to only four photographers, keeping the coach-to-student ratio tight. We cover every location above, adapt to conditions, and run daily Lightroom and Photoshop labs so you leave with finished files, not homework. All transport, accommodation and permits are handled. Priority spots are filling fast for the Q4 2025 intake. Join the wait-list here and I’ll send you full details plus an early-bird discount. See you on the Sunshine Coast.

Ultimate Guide to Sunshine Coast Photography Workshops (2025–2026)

Landscape, Seascape & Astrophotography Courses | Noosa, Coolum, Borumba Dam & Glass House Mountains

The Sunshine Coast in Queensland is a photographer's dream, blending iconic coastal sunrises, majestic hinterland vistas, and pristine astrophotography locations. Whether you're chasing golden sunrises, dramatic long exposures, or star-filled skies, the Sunshine Coast delivers year-round.

I’m Dylan Knight, an award-winning photographer with nearly a decade of experience, certified by the Professional Photographers' Association of Queensland (CCP). This guide is your definitive resource for discovering why the Sunshine Coast is a top photography destination and how my workshops can elevate your craft—whether you’re local, interstate, or international.

🌅 Why the Sunshine Coast is a Photographer’s Paradise

The Sunshine Coast uniquely combines diverse terrains within close proximity, offering:

  • Iconic Sunrise Spots: Point Cartwright, Coolum Beach, Noosa National Park

  • Dramatic Hinterland Scenes: Glass House Mountains, One Tree Hill (Maleny)

  • Pristine Dark-Sky Locations: Borumba Dam (perfect for Milky Way photography)

  • Waterfalls & Rainforests: Kondalilla Falls, Buderim Forest (ideal after rain)

Consistently good light, minimal crowds, and diverse landscapes make this region an unbeatable photographic playground.

📷 What You’ll Master in My Photography Workshops

Every workshop builds both confidence and creativity, tailored to your experience level:

🌊 Seascape & Landscape Photography

  • Master foreground composition and leading lines

  • Capture compelling sunrise and sunset scenes

  • Learn long exposure techniques with ND filters

  • Safely shoot dynamic wave action and tide interactions

✨ Astrophotography & Night Sky Mastery

  • Expertly photograph the Milky Way and star trails

  • Use trackers for long exposures and stacking methods

  • Blend foreground elements seamlessly into starry skies

  • Optimize camera settings for low-light conditions

🖥 Post-Processing in Lightroom & Photoshop

  • Comprehensive editing workflows (exposure, color, sharpening)

  • Noise reduction and advanced blending techniques

  • Personalized editing sessions available online or in-person

🗓 Workshop Types: Private, Single-Day & Multiday

✅ Private 1-on-1 Workshops

  • Price: From $149 (1-hour) to $295+ (full-day)

  • Perfect For: Customised guidance, flexible scheduling, accelerated learning

✅ Single-Day Group Workshops

  • Price: $150–$250 per person

  • Perfect For: Quick skills upgrade, specific location mastery (sunrise, sunset, astro)

✅ Multiday Workshop Retreats

  • Price: From AU$1,650 (3-day) up to AU$6,950 (5-day luxury retreats)

  • Locations: Sunshine Coast, Uluru, Cradle Mountain, Kimberleys

  • Perfect For: Full immersion, advanced techniques, portfolio-building

📍 The Best Photography Locations on the Sunshine Coast

🌴 Noosa National Park Photography

Best Time: Sunrise, early golden hour
Why Visit: Rugged coastal landscapes, pandanus-lined beaches, turquoise waters
Perfect for seascape composition and sunrise photography.

🌊 Coolum Beach & Headland

Best Time: Sunrise, golden hour, afternoon pastels
Why Visit: Dramatic rocks, long-exposure opportunities, pastel skies
Excellent for mastering water motion and shutter speed.

🌳 One Tree Hill (Maleny)

Best Time: Astro photography, sunrise fog
Why Visit: Iconic minimalist compositions, atmospheric layers
Ideal for starry skies and ethereal sunrise imagery.

🌌 Borumba Dam Astrophotography

Best Time: Astro season (April–August), late blue hour
Why Visit: Low light pollution, reflective lake surfaces, pristine Milky Way
Unmatched for astro-photography practice.

🌅 Point Cartwright Seascapes

Best Time: Sunrise low-tide, dramatic astro
Why Visit: Textured rock shelves, wave dynamics, lighthouse compositions
Perfect for dynamic seascape training.

⛰ Glass House Mountains

Best Time: Foggy sunrise, sunset silhouettes
Why Visit: Iconic volcanic peaks, dramatic layered compositions
Ideal for drone and telephoto compression shots.

📆 Seasonal Guide: Best Times for Photography

Season Best For Photography Highlights
Summer (Dec–Feb) Seascapes Warm sunrise colors, dramatic cloud build-ups
Autumn (Mar–May) Astro + Sunrise Clear skies, early Milky Way, glassy reflections
Winter (Jun–Aug) Astro Optimal Milky Way visibility, crisp conditions
Spring (Sep–Nov) Variety Thunderstorms, wildflowers, late Milky Way

Pro Tip: Schedule astro sessions in late autumn/winter for best star visibility.

🎒 Essential Gear Recommendations

Camera Bodies

  • DSLR/Mirrorless with manual mode (e.g., Nikon Z8, Z6II, D850)

Recommended Lenses

  • Wide (14–24mm f/2.8): Seascapes, astro

  • Standard Zoom (24–70mm): General landscapes

  • Telephoto (70–200mm): Hinterland compression, details

Filters (Essential)

  • ND filters (long exposures)

  • Graduated ND (sunrise/sunset)

  • CPL (reduce glare/reflections)

Astro Gear

  • Star tracker (optional but beneficial)

  • Sturdy tripod, red headlamp, extra batteries

  • Dew heater or hand warmers for cold nights

❓ FAQs

Q: Are workshops beginner-friendly?
Yes, all workshops are tailored from beginner to advanced photographers.

Q: Do I need expensive gear?
No, any camera with manual control is suitable; guidance is tailored to your existing kit.

Q: What’s your cancellation/rescheduling policy?
Flexible—weather-based reschedules or full credit given; your investment is safe.

Q: Is there significant walking involved?
Minimal—most locations are within short walks from parking areas.

Q: Can I book private online editing sessions?
Yes, I offer personalized Lightroom & Photoshop coaching via Teams.

📅 How to Book & Next Steps

Spaces are limited—early booking is strongly recommended.

Ready to Capture Incredible Images?

Experience hands-on photography workshops tailored to your skill level, with personal guidance from an accredited local photographer. Create unforgettable photos while discovering the Sunshine Coast’s most breathtaking locations.

👉 Book Your Sunshine Coast Photography Workshop Now
Early-bird discounts and gift certificates available.

About Knighty’s Photography:
Dylan Knight is a CCP-certified, award-winning photographer with nearly 10 years of experience running landscape and astrophotography workshops across Queensland. Comprehensive liability insurance up to AU$20 million ensures peace of mind, and participants receive exclusive reseller discounts on top photography brands.

A New Milestone: Becoming a Certified Professional Photographer

What It Means to Be a Certified Professional Photographer (CCP)

If you’ve been browsing photography services, you might have seen the phrase “Certified Professional Photographer” (CCP) and wondered what it actually means. I’m excited to share that I’ve earned my CCP accreditation through the Professional Photographers’ Association of Queensland (PPAQ)—and I’d love to explain why this is a big deal, both for me and for you!

1. What Is a CCP?

A CCP is a formal credential granted by the PPAQ to photographers who meet rigorous professional standards. That includes:

  • Demonstrating consistent technical skill and artistic quality across a portfolio.

  • Passing a review (often including a written component or practical evaluation) focused on photography principles and best practices.

  • Committing to ongoing professional development and ethical standards.

The end goal? Raising the bar for professional photography so that clients—like you—can book with confidence.

2. The Journey to Certification

Earning a CCP is not a casual checkbox. For me, the process involved:

  • Portfolio Submission: I selected a cross-section of my work showcasing technical accuracy (exposure, composition, lighting) and creativity.

  • Peer Assessment: Experienced professionals evaluated my submissions. Their feedback pushed me to refine my craft and maintain consistent, high-quality results.

  • Continued Education: CCP status isn’t “one and done.” I’ll be completing ongoing training to remain up-to-date with new techniques, technologies, and standards.

It was challenging, exciting, and incredibly rewarding. I came out of it a better photographer—and that’s something you’ll notice in every photo I deliver.

3. Why It Matters for You

A Certified Photographer has proven skills and a commitment to quality. Here’s what that means in practical terms:

  • Reliability & Consistency: You can expect professional results across all your photos, from family portraits to big events.

  • Attention to Detail: I don’t just “click and hope.” Techniques like lighting, posing, and post-processing follow proven standards.

  • Ethical Standards: As part of my certification, I’ve also pledged to follow industry best practices and maintain high professional ethics.

  • Ongoing Improvement: Through continued education and workshops, I’m always learning new ways to create stunning, timeless images for my clients.

4. Elevating Your Photography Experience

Having a CCP behind my name isn’t just about professional pride—it’s about giving you the best possible photography experience. Whether you’re booking me for a wedding, a portrait session, or a commercial project, I want you to feel confident knowing you’ve hired someone recognized for expertise and integrity.

5. Let’s Capture Your Story

Photographs are more than just pictures on a screen or prints on a wall; they’re the stories you’ll revisit and share for years to come. My goal as a CCP is to preserve these special moments in a way that truly reflects you—your personality, your passion, your brand, your family.

If you have any questions about my certification or want to chat about your upcoming photography needs, feel free to reach out! I’m here to help you capture life’s important milestones with professionalism, creativity, and the expertise that comes from being a Certified Professional Photographer (CCP).

Thank you for reading! Stay tuned for more updates, behind-the-scenes looks at my work, and helpful photography tips right here on the blog.


Top 5 Nikon Lenses for 2024: Enhance Your Photography Game

Whether you're an amateur photographer or a seasoned professional, having the right lens can make all the difference in capturing breathtaking images. In this article, we will explore the top five Nikon lenses for 2024, each offering unique features to elevate your landscape photography. Let's dive into the details.

1. Nikon AF-S NIKKOR 14-24mm f/2.8G ED

Best Overall for Landscape Photography

The Nikon AF-S NIKKOR 14-24mm is acclaimed as the best overall lens for landscape photography. Its ultra-wide-angle zoom and fast f/2.8 aperture are perfect for capturing expansive scenes with stunning clarity. This lens offers exceptional optics with edge-to-edge sharpness and minimal distortion, making it a top choice for professional landscape photographers.

Personal Insight: This lens has been on every single trip and has captured the majority of my portfolio photos, including nearly all of my astrophotography images. The 14mm wide-angle capability of this lens aligns perfectly with my style, which focuses on capturing textures and interesting foreground elements that guide the viewer's eye into the scene.

Key Features:

  • Focal Length: 14-24mm

  • Maximum Aperture: f/2.8

  • Superior Optical Performance

  • Robust Build Quality

2. Nikon AF-S DX NIKKOR 35mm f/1.8G

Best for Versatility

The compact and lightweight Nikon AF-S DX NIKKOR 35mm f/1.8G excels in both landscape and general photography. Its fast f/1.8 aperture performs superbly in low-light conditions and allows for beautiful background blur, making it an excellent choice for photographers on the move.

Key Features:

  • Focal Length: 35mm

  • Maximum Aperture: f/1.8

  • Compact and Lightweight

  • Excellent Low-Light Performance

3. Nikon AF-S FX NIKKOR 20mm f/1.8G ED

Best Wide-Angle Lens

Ideal for those who prefer a prime lens, the Nikon AF-S FX NIKKOR 20mm f/1.8G ED offers a broad field of view, perfect for capturing sweeping landscapes. Its wide f/1.8 aperture allows excellent control over depth of field and performs well in various lighting conditions.

Key Features:

  • Focal Length: 20mm

  • Maximum Aperture: f/1.8

  • Wide Field of View

  • High-Quality Optics

4. Nikon AF-S NIKKOR 24mm f/1.8G ED

Best Lightweight Option

Known for its precision and compact design, the Nikon AF-S NIKKOR 24mm f/1.8G ED provides sharp images with minimal chromatic aberration. This lens is a top choice for photographers who need a high-quality, portable option.

Key Features:

  • Focal Length: 24mm

  • Maximum Aperture: f/1.8

  • Lightweight and Portable

  • Excellent Image Quality

5. Nikon AF-S NIKKOR 70-200mm F/2.8E FL ED VR

Best for Versatility in Professional Photography

The Nikon AF-S NIKKOR 70-200mm F/2.8E FL ED VR is a powerhouse for low-light, sports, wildlife, concerts, weddings, portraits, and everyday shooting. This lens is a dream for professionals and hobbyists alike, with significant improvements in optical formula, handling, weather sealing, and VR image stabilization.

Personal Experience: This lens has refined my landscape photography by isolating subjects and eliminating distractions, focusing on elements such as mountains, intriguing trees, or distinctive rock formations. It has also been my gateway into wildlife photography.

Key Features:

  • Focal Length: 70-200mm

  • Maximum Aperture: f/2.8

  • Advanced VR Image Stabilization: Up to 4 stops

  • Exceptional Optical Performance

  • Durable Build

Comparative Analysis

Lens Focal Length Max Aperture Weight Best For
14-24mm f/2.8G ED 14-24mm f/2.8 1000g Overall Landscape
35mm f/1.8G 35mm f/1.8 200g Versatility
20mm f/1.8G ED 20mm f/1.8 355g Wide-Angle
24mm f/1.8G ED 24mm f/1.8 355g Lightweight
10-24mm f/3.5-4.5G ED 10-24mm f/3.5-4.5 460g DX Format Cameras

Enhance Your Gear with Exclusive Discount

Upgrade your photography equipment with Nikon and enjoy a special 10% discount. Use the code DYLAN10 on the Nikon Australia website. Terms apply.

The Essential L-Bracket: Why Every Photographer Needs One

If you've ever been caught up in the exhilarating race against a setting sun or changing landscape, you'll know how crucial it is to have the right tools on hand. The tool I want to highlight today is the L-Bracket, a simple piece of equipment that, once discovered, can become as vital to your photography kit as the lens itself. Especially for beginners who may not be familiar with it, let's start by demystifying the L-Bracket and why it's such a game-changer.

Picture this: You've got a camera set up on a standard tripod without an L-Bracket and one equipped with an L-Bracket, side by side. The L-Bracket setup shines with its ease and speed of changing from landscape to portrait orientation, a godsend when seconds count in capturing the perfect light.

I remember vividly two years into my own photography journey when I first used an L-Bracket. My immediate reaction was, "Why didn't I do this sooner?" I had spent countless hours struggling with restrictive standard tripod ball heads, wrestling for the perfect shot instead of focusing on composition and timing. The L-Bracket became a liberator, allowing me to concentrate on what mattered most - the art of photography.

The L-Bracket, typically made from a durable aluminium alloy, is a light addition to your setup that can revolutionise your shooting experience. Designed with a convex edge, it ensures the camera won't twist or shift during use, while the safety stop screws add another layer of security during installation or removal. The bracket features a broad gap on one side, allowing unrestricted access to the camera's ports. Its skeleton-style design minimises weight while maximising durability, and it's compatible with both Arca and Really Right Stuff style clamps, making the switch between horizontal and vertical orientations a breeze.

Now, let me break down some key benefits that L-Brackets offer.

1. Speed

The L-Bracket is an absolute lifesaver when you're on the move. I'm not the type to stand in one spot, waiting for the perfect light or shot. I love exploring the area, hunting for potential compositions before the peak colour or light. This is where the L-Bracket shines—facilitating swift change between landscape and portrait orientations, helping me capture as many frames as possible.

2. Easy Orientation Change

It's crucial to get the orientation right in the field. Cropping a landscape shot into a portrait can mean losing half the pixels and image quality. The L-Bracket ensures smooth transitioning between orientations and eliminates interference between the tripod and ball head.

3. No Tripod and Ball Head Interference

Have you ever struggled to frame a portrait shot because your camera hits the tripod, or you've had to move the entire tripod to centre your subject? The L-Bracket eliminates these issues, allowing the camera to sit on top, making shooting easier and maintaining centre stability on the tripod.

4. which L-Bracket to choose?

While many brands offer specific models for your camera, universal ones can work just as well. They allow change between orientations and offer cutouts for all the camera’s ports. I've personally been using the Sunwayfoto PNL-D850 Custom L Bracket for Nikon D850/D810 for the last 4 years and it hasn't let me down. Its durability and compatibility with Arca-type and Really Right Stuff lever clamps make it a reliable choice.

Conclusion

To wrap it up, investing in an L-Bracket can be a game-changer for your photography. It can save you precious time, reduce frustration, and allow you to focus on what truly matters—creating beautiful images. So, if you haven’t already, give the L-Bracket a go. You won't look back!

Feedback

I'm eager to hear about your experiences with L-Brackets, and any tips you have for using them. Feel free to share your thoughts in the comments. Let's keep learning and growing together on this exciting photography journey!

Capture Kiama’s Natural Wonders: A Photographer’s Guide to Bombo Quarry, Cathedral Rocks, and Minnamurra

Discover how to photograph Bombo Quarry, Cathedral Rocks, and Minnamurra in Kiama, NSW. Get expert tips, gear advice, and workshop-ready insights from a landscape and astrophotographer.

Read More

10 Compositional Tips for Landscape Photography

1. Rule of thirds

The rule of thirds is a fundamental principle of composition that suggests that an image is most aesthetically pleasing when its subject is placed along one of the lines that divide the image into thirds, horizontally or vertically. This rule is based on the idea that the human eye is naturally drawn to points of interest that are located at the intersections of these lines.

To use the rule of thirds in your compositions, you can divide your frame into a 3x3 grid by drawing two equally spaced horizontal lines and two equally spaced vertical lines. Then, you can place the main subject of your image along one of these lines or at one of the intersections. For example, you might place the horizon of a landscape along the top or bottom third of the frame, or you might place the main subject of a portrait along one of the vertical thirds.

By using the rule of thirds in your compositions, you can create balanced and visually appealing images that draw the viewer's attention to the main subject and provide a sense of structure and organisation.

2. Leading lines

Lines are an important element in photography that can be used to add depth and interest to an image. Lines that lead the eye through the image, such as roads, streams, or fences, can help to create a sense of movement and guide the viewer's gaze through the frame. These lines can be used to direct the viewer's attention to the main subject or to create a sense of depth and perspective in the photograph.

There are many different types of lines that can be used in photography, and you can be creative in the way you use them to add interest to your images. For example, you might use the structure of a rock or the shape of different stones to create lines and patterns in the foreground of your image. Similarly, you might use lines in the sand, broken branches, or other elements to create a sense of texture and depth. By incorporating lines into your compositions, you can add depth and interest to your images and guide the viewer's gaze through the scene.

3. Foreground interest

Including elements in the foreground of a landscape photograph can be an effective way to add depth and dimension to the image. By placing objects in the foreground, you can create a sense of perspective and distance, making the background elements appear farther away and giving the image a sense of depth.

There are many different types of elements that you can include in the foreground of your landscape photographs, such as rocks, plants, or other natural features. For example, you might include different textures found in the foreground, such as leaves, rocks, or flowing water, to add interest and depth to the image. You can also use the elements in the foreground to create a sense of movement and guide the viewer's gaze through the scene. By carefully considering the elements in the foreground of your landscape photographs, you can create more dynamic and interesting images that capture the viewer's attention.

4. Balance

A balanced composition is one in which the elements of the image are evenly distributed and create a sense of harmony. This can be achieved in a variety of ways, such as by placing the main subject in the centre of the frame or by using elements on either side of the frame to balance the composition.

One way to create a balanced composition is to place the main subject in the centre of the frame, using the surrounding elements to create symmetry and balance. For example, you might photograph a lone tree in the centre of the frame, with a dramatic sky above and a clear, open foreground below. This simple and balanced composition can create a sense of harmony and draw the viewer's attention to the main subject.

Alternatively, you can use elements on either side of the frame to balance the composition and create a sense of harmony. For example, you might photograph a landscape with a dramatic mountain on one side of the frame and a calm lake on the other, using the contrasting elements to create balance and interest in the image. By considering balance in your compositions, you can create harmonious and aesthetically pleasing images that engage the viewer.

5. Perspective

The angle from which a photograph is taken can have a significant impact on its overall composition and the way it is perceived by the viewer. Changing the angle of the camera can alter the perspective and give a different sense of scale and proportion to the subjects in the photograph. For example, taking a photograph from a high angle can give a sense of grandeur and sweep, making the subjects appear smaller and the surroundings seem larger. On the other hand, a photograph taken from a low angle can make the subject appear larger and more imposing, giving the image a sense of power and dominance.

The angle of the photograph can also be used to highlight specific details or textures. For example, if you are photographing a wave coming in over some rocks, a low angle might allow you to capture the sweeping motion of the wave and the texture of the rocks. Alternatively, if you are photographing a mountain, a high angle might allow you to capture the vast details and make the mountain appear larger and more prominent. By considering the angle at which you take a photograph, you can add depth and interest to your images and control the way the subject is perceived.

6. Framing

Using elements within the scene to frame the main subject can be an effective technique for adding depth and interest to a photograph. This can be done by positioning the frame around the main subject, or by using the frame to draw the viewer's eye to the main subject. For example, you might use trees or arches to frame the main subject, or you might use the edge of a doorway or window shape to create a natural frame.

Using a longer focal length can also help to frame the image and flatten the background, making it appear closer and more appealing. A longer focal length has a narrower field of view and can create a shallower depth of field, which can help to draw attention to the main subject and blur the background. This can be especially effective when shooting mountains or other close-up subjects, as it can help to create a sense of intimacy and focus. By using elements in the scene to frame the main subject, you can add depth and interest to your images and draw the viewer's eye to the most important elements of the scene.

7. Negative space

Negative space refers to the area around and between the main subjects in an image. Including negative space in a photograph can help to emphasise the main subject and create a sense of balance in the composition. Negative space can be used to create a sense of openness and emptiness, allowing the viewer's eye to rest and focus on the main subject.

For example, you might photograph your main subject against a blank sky for the background to create a sense of negative space and emphasise the subject. This can be especially effective when the main subject is a small or detailed object, as the negative space can help to draw attention to the subject and create a sense of balance in the image. Alternatively, you might use negative space to create a sense of isolation or loneliness, depending on the mood and message of your photograph. By including negative space in your compositions, you can create dynamic and interesting images that emphasise the main subject and create a sense of balance.

8. Simplicity

When composing a photograph, it is often best to keep things simple and avoid cluttering the image with too many competing elements. A photograph with a simple, uncluttered composition can be more effective and easier for the viewer to understand and engage with. In contrast, an image with too many competing elements can be overwhelming and confusing, making it difficult for the viewer to focus on the main subject.

For example, when photographing a mountain scene, you might choose to focus on a lone jagged peak, rather than including multiple peaks in the frame. This simple composition can create a strong and powerful image that draws the viewer's attention to the peak and avoids distractions. Similarly, when photographing other subjects, you might choose to eliminate unnecessary elements and focus on the main subject to create a more effective and impactful photograph. By keeping your compositions simple and uncluttered, you can create powerful and engaging images that communicate your message effectively.

9. Cropping

Cropping is an important technique in photography that involves trimming or cutting away parts of an image to change its composition. Careful cropping can help to improve the overall balance and focus of a photograph by eliminating distractions and highlighting the main subject. For example, if you are photographing a tree, you might crop out the branches to focus on the leaves and flowers, or you might crop out distracting elements in the background to create a cleaner and more cohesive image.

Cropping can also be used to adjust the aspect ratio of an image, which is the relationship between its width and height. By cropping an image to a specific aspect ratio, such as a traditional 4:3 or a modern 16:9, you can produce a more visually appealing photograph that conforms to standard print or display sizes. In this way, cropping can be a powerful tool for creating superior images that are well-composed and visually appealing.

10. Depth of field

A shallow depth of field refers to a photograph in which only a small area appears to be in focus, while the rest of the image appears blurry. This technique can be used to draw attention to the main subject of the photograph and create a sense of depth. For example, if you are photographing a flower, using a shallow depth of field can help to blur the background and make the flower stand out as the primary focus of the image. On the other hand, if you are photographing a landscape, you might want to use a deep depth of field to keep everything in the image in focus, from the foreground to the background. By understanding how to control the depth of field in your photographs, you can effectively highlight the most important elements of your scene and create a sense of depth and dimension.

11. Bonus Tip

Pay attention to the light and how it changes from different times to different conditions. Light is one of the most important elements in photography, and it can greatly affect the mood and feel of a photograph. In landscape photography, you can use the light to highlight certain elements in the scene and create a sense of drama or mood. For example, you might use backlighting to create a silhouette effect, or you might use soft, diffused light to create a dreamy, ethereal feel. Paying attention to the direction and quality of the light can help you create more dynamic and interesting landscape photographs.

Conclusion

There are several important fundamentals to consider when composing a landscape photograph. These include the rule of thirds, leading lines, foreground interest, balance, perspective, framing, negative space, simplicity, cropping, depth of field, and the quality of light. By applying these principles, you can create more dynamic, interesting, and aesthetically pleasing landscape photographs. It's important to remember that these are just guidelines, and that you should feel free to experiment and try different compositions to see what works best for your particular scene. The most important thing is to have fun and be creative, and to keep practicing and learning to improve your skills as a landscape photographer.

Three Fundamentals of Photography

Photography involves capturing light with a camera to create an image. The three fundamentals of photography are, Aperture, ISO, and Shutter Speed, which are all related to how a camera handles light. Here's a brief overview of each one including some history behind them.

History of these fundamentals

The three fundamentals of photography - Aperture, ISO, and Shutter Speed - have a long history that dates back to the earliest days of photography.

Aperture has been a key component of photography since the earliest cameras were developed in the early 19th century. In the earliest cameras, the aperture was controlled by adjusting the size of the aperture plate, which was a metal plate with a hole in the centre that was placed in front of the lens. As photography technology developed, camera lenses became more sophisticated, and the aperture was controlled by the size of the lens opening itself.

ISO, which stands for International Organisation for Standardisation, was originally developed as a way to standardise film sensitivity ratings across different manufacturers. In the early days of film photography, each film manufacturer used their own system for rating the sensitivity of their film, which made it difficult for photographers to accurately compare different films. ISO was introduced as a standardised system for rating film sensitivity, which allowed photographers to easily compare different films and choose the one that was best suited to their needs.

Shutter Speed, which refers to the length of time that the camera's shutter is open, has also been a fundamental aspect of photography since the earliest cameras were developed. In the early days of photography, shutter speed was controlled by the length of time that the aperture plate was left open, which was usually adjusted by hand. As photography technology developed, shutters became more sophisticated and shutter speed could be more accurately controlled.

Fundamentals

1. Aperture

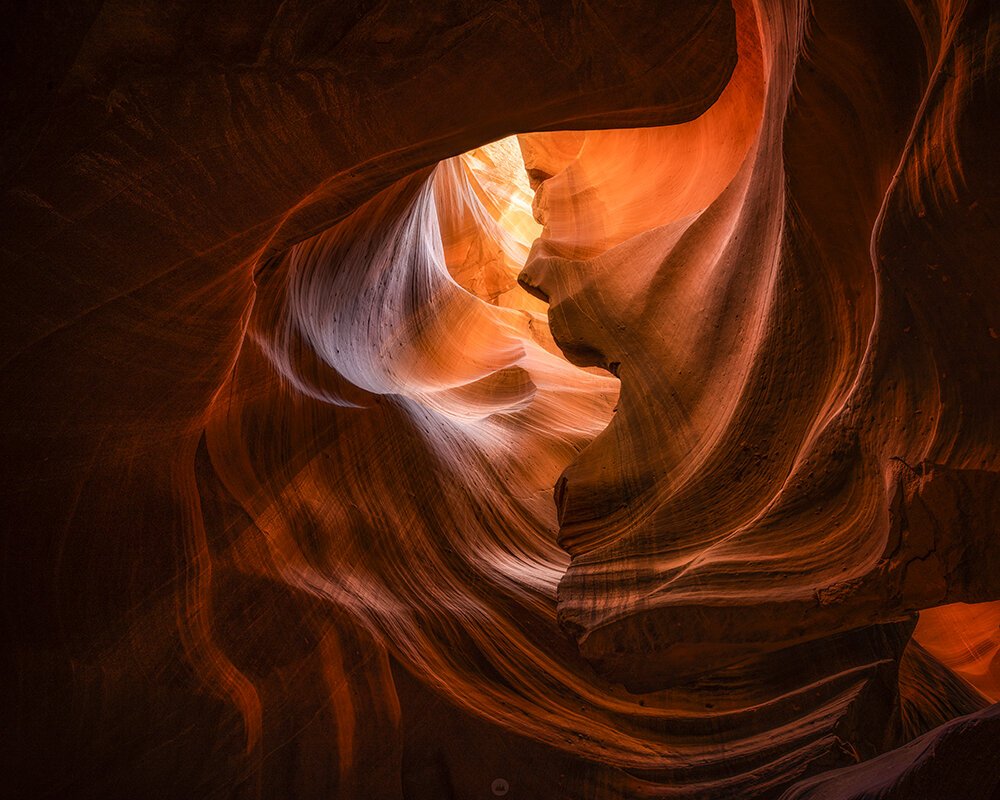
Aperture refers to the size of the opening in a camera's lens through which light enters. Aperture is measured in "F-Stops," with a smaller F-Stop number corresponding to a wider aperture and a larger F-Stop number corresponding to a narrower aperture. The aperture of a camera controls the amount of light that enters the lens and reaches the camera's sensor, as well as the depth of field in an image (i.e., the range of distances in a scene that appear in focus).

2. ISO

ISO is a measure of a camera's sensitivity to light. A higher ISO value means that the camera is more sensitive to light, which can be useful in low-light situations. However, increasing the ISO can also introduce noise (graininess) into an image.

3. Shutter Speed

Shutter speed refers to the length of time that the camera's shutter is open, allowing light to reach the camera's sensor. Shorter shutter speeds freeze the action and are useful for capturing fast-moving subjects, while longer shutter speeds allow for the capture of motion blur and are useful for creating certain artistic effects.

Together, aperture, ISO, and shutter speed form the "exposure triangle" in photography, as they all work together to determine the overall exposure of an image (i.e., the brightness or darkness of the image). By adjusting these three settings, a photographer can control the amount of light that enters the camera and create the desired effect in their image.

Break It Down with Examples

Aperture

• Using a wide aperture (e.g., F/2.8) can create a beautiful bokeh effect (a blurred, out-of-focus background) in a portrait, drawing the viewer's attention to the subject.

• Using a narrow aperture (e.g., F/16) can be useful for landscape photography, where you want as much of the scene to be in focus as possible.

ISO

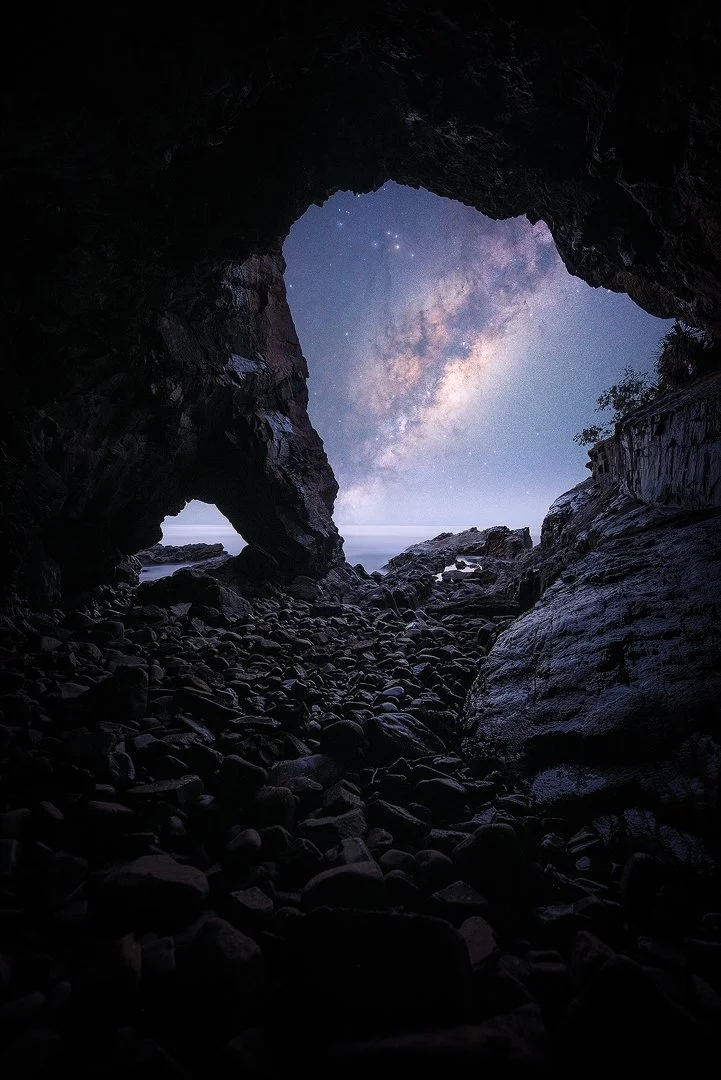
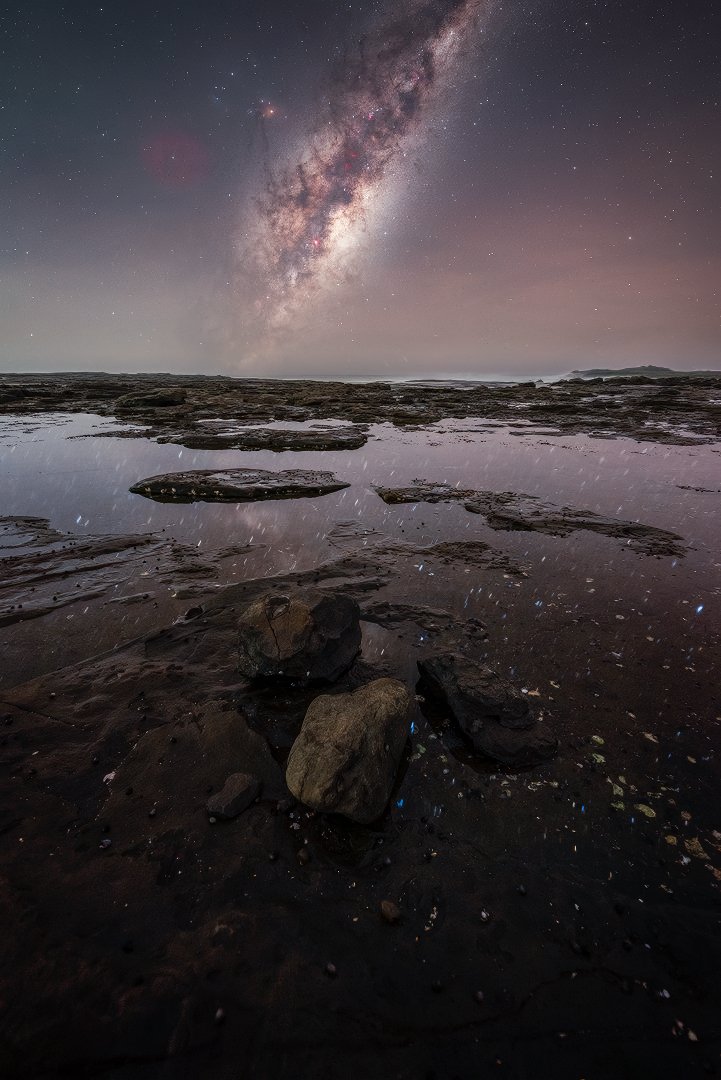
• In a low-light situation, such as at a concert or shooting Astro, increasing the ISO can help to capture a properly exposed image without using a flash or external light sources.

• In a brightly lit outdoor scene, a lower ISO value (e.g., ISO 100) can be used to avoid introducing noise into the image.

Shutter Speed

• Using a fast shutter speed (e.g., 1/1000th of a second) can help to freeze the action in a sports photograph.

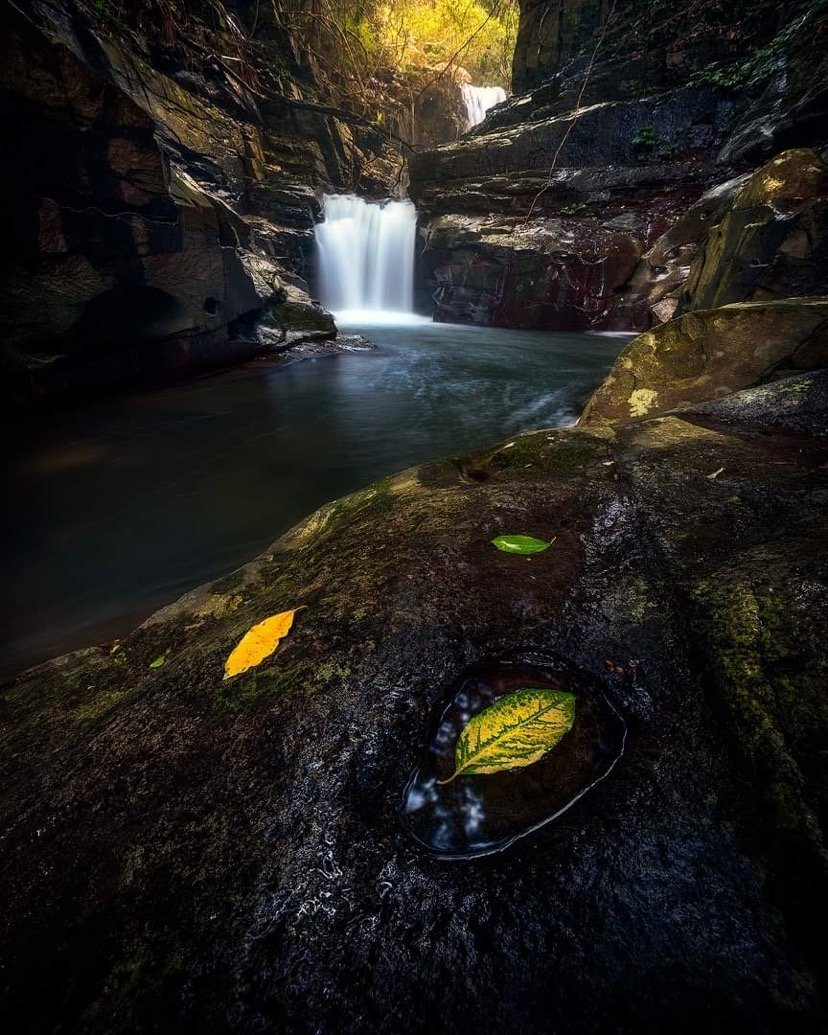
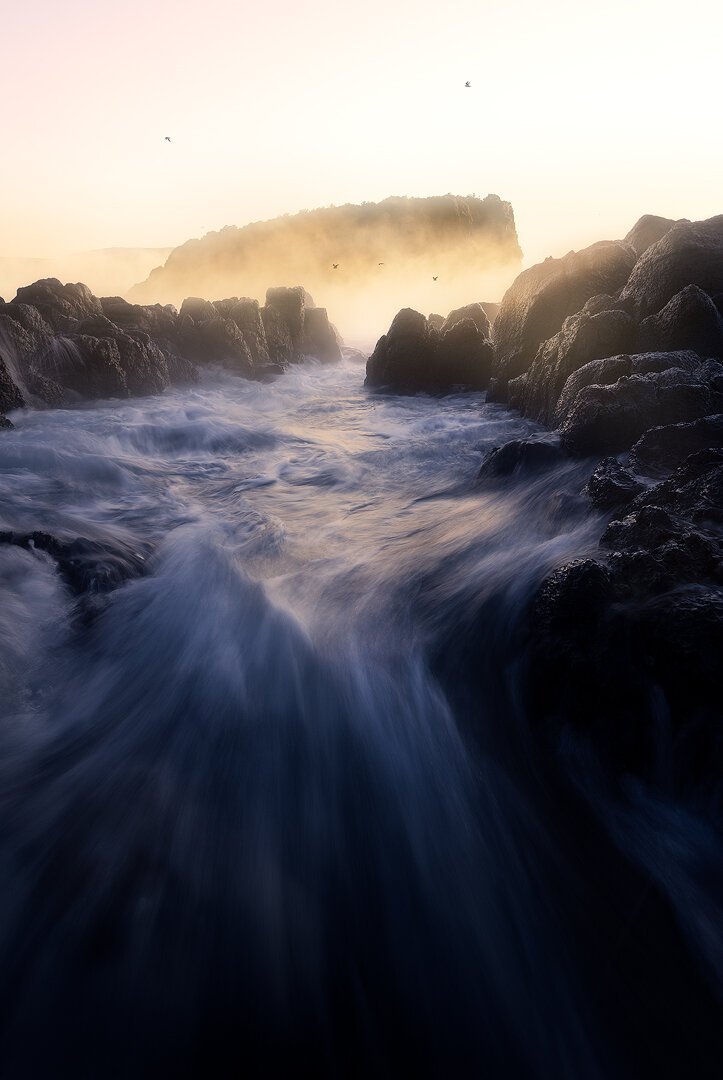
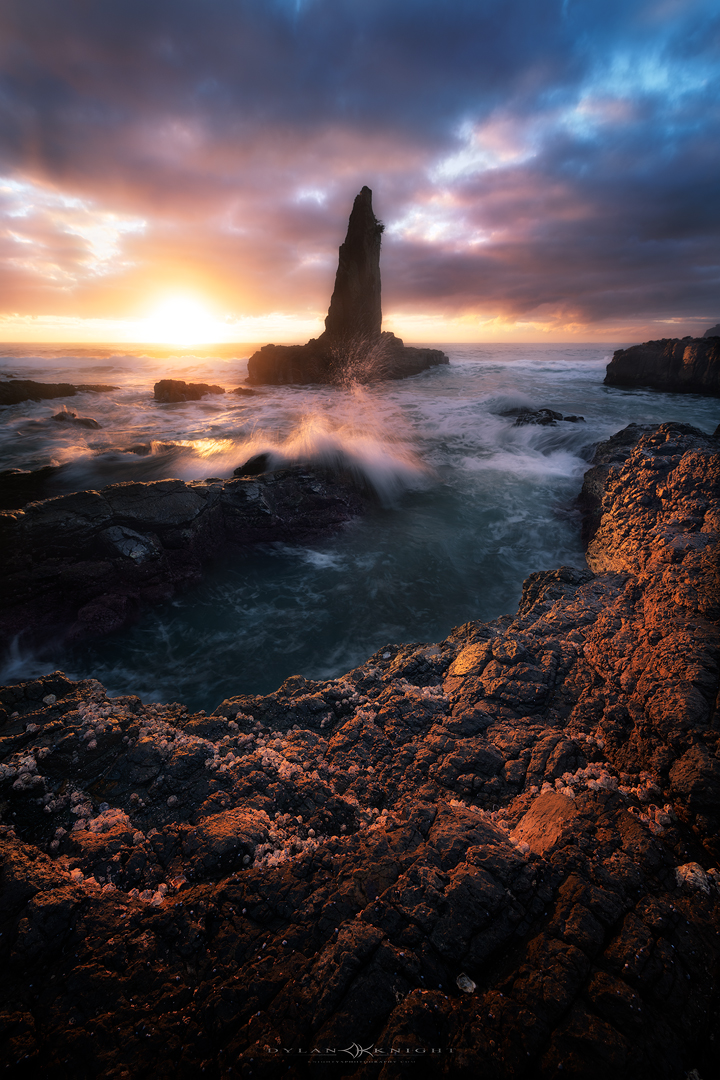
• Using a slow shutter speed (e.g., 1 second) can create a sense of movement and dynamism in a photograph of flowing water or a moving car.

In conclusion, the three fundamentals of photography - aperture, ISO, and shutter speed - all work together to determine the overall exposure of an image and allow photographers to control the amount of light that enters the camera. By adjusting these settings, photographers can achieve various effects, such as a blurred background in a portrait or a sense of movement in a photograph of flowing water. Understanding and mastering these fundamentals is essential for photographers looking to create high-quality images.

Mastering Milky Way Photography: Comprehensive Tips and Gear Recommendations

1. Unlocking the Milky Way’s Secrets

Understanding the Milky Way's position and movements across the night sky is the first step in astrophotography. Its visibility varies throughout the year, with different sections coming into view at different times. Here's a more technical breakdown of how to locate the Milky Way from Australia:

Seasonal Movement:

The Milky Way's core, which is the most visually dense and interesting part to photograph, becomes visible in the east around February in Australia. This period is known as the 'early season'. As we progress towards mid-year, the core rises higher into the sky, appearing vertical, and then eventually flips over, lying parallel to the horizon. It's essential to plan your photography outings based on this progression for capturing the most striking images.

Apps to Assist:

Leverage technology to navigate the night sky effectively. Apps like PhotoPills and SkyGuide are powerful tools in your astrophotography arsenal.

  • PhotoPills: This app is a comprehensive planner for astrophotography, providing critical data like moon phases, rise and set directions, and visibility timings. Its Virtual Reality (VR) option is a game-changer for location scouting. It allows you to virtually overlay the Milky Way onto the landscape from your planned shooting spot, helping to pre-visualise your compositions.

  • SkyGuide: Another great tool for identifying celestial bodies. It's intuitive and user-friendly, making it easier for beginners to understand the night sky's layout.

Understanding Light Pollution:

The level of detail you can capture of the Milky Way greatly depends on the darkness of your sky, primarily affected by light pollution. Websites such as "Light Pollution Map" can help you find dark sky locations with less light pollution, increasing the chances of a clear, detailed Milky Way shot.

Planning Your Shoot:

A well-planned shoot increases the chances of a successful outing. Check the weather forecast to ensure clear skies. Use the New Moon phase, or a moonset before Milky Way rise time, for the darkest skies. Plan your composition during daylight to avoid fumbling in the dark and use apps like PhotoPills to visualise the Milky Way's position at your planned shooting time.

As you become more familiar with these tips, finding the Milky Way will become second nature. The next step is to master capturing it with your camera, which we'll cover in our next point.

2. Mastering Focus in the Dark

One of the most challenging aspects of night sky photography is nailing focus. In the dark, your camera's autofocus may struggle, leading to blurry or less sharp images. Here's a more detailed, technical guide on how to achieve crisp focus in astrophotography:

Manual Focus:

It's recommended to switch to manual focus mode when photographing the night sky. This gives you complete control over your focus and allows for precision.

Focus on a Bright Star:

Firstly, find a bright star in your viewfinder or live view screen. Turn your focus ring to the “infinity” (∞) symbol as a starting point, which should make the star appear reasonably sharp. Now, use your camera's live view digital zoom feature (not optical zoom, your focal length should remain unchanged) to magnify the view of the star.

Adjust Until Sharp:

Slowly adjust the focus ring while observing the star on your live view screen. The goal is to make the star as small and as round as possible. This indicates that the star, and therefore the rest of the night sky, is in focus.

Lock Your Focus:

Once you've achieved sharp focus, it's important not to accidentally move the focus ring. Some lenses have a focus lock feature which can be helpful, or you can use a piece of gaffer tape to secure the position.

Focus on Foreground:

If you plan to include a foreground element in your composition, such as a tree, rock, or mountain, you may want to focus-stack your images. This involves taking one image focused on the stars, and another image focused on your foreground subject, then blending them together in post-processing to achieve sharpness throughout the frame. Use a bright torch to illuminate the foreground for focusing.

Confirm with Test Shots:

Always take a test shot after you think you've got the focus right. Zoom in on the image preview to double-check the stars are sharp. If not, make slight adjustments and repeat.

Remember the Conditions:

Every night is different, so what worked last time might not work this time. Humidity, temperature, and other factors can affect how your lens focuses, so it's important to always test and adjust each time you're out.

Achieving sharp focus under a starlit sky can feel like a magic trick, but with these tips and a little practice, you'll be able to consistently capture the intricate details of the Milky Way with precision.

3. Cutting Down Noise

Digital noise can be a nemesis for any photographer, particularly in low-light conditions like night sky photography. This graininess can obscure the fine details of the Milky Way. Here's a more detailed and technical guide to reducing noise in your astrophotography:

Understanding Digital Noise:

Digital noise is random variation of brightness or colour information in images. It is primarily produced by the sensor and circuitry of a digital camera during exposure, and is exacerbated in low-light conditions and at higher ISO settings.

Shoot at Lower ISO:

Lower ISO settings generally produce less noise, but also make your camera less sensitive to light. This trade-off is why we often need to increase ISO for night photography. However, using a fast lens (with a large aperture, such as f/2.8 or f/1.4) and longer exposures can compensate for the reduced light sensitivity, allowing you to capture more light without significantly increasing noise.

Long Exposure Noise Reduction:

Many digital cameras have a feature called Long Exposure Noise Reduction (LE NR) or similar. This setting takes two photos every time you press the shutter: one regular photo, and one with the shutter closed. The camera then subtracts the noise in the second "black frame" from the first photo. However, using this feature doubles the time it takes to make each exposure, which may not be ideal in some scenarios.

Stacking Images:

An effective method of reducing noise in post-processing is to stack multiple exposures of the same scene. This technique involves capturing a sequence of images, typically between 5 to 20, which are then overlaid and averaged out in stacking software such as Sequator, Starry Landscape Stacker, or Adobe Photoshop. This process increases the signal-to-noise ratio, enhancing the details captured in each shot and decreasing random noise.

Use a Star Tracker:

A star tracker is a device that compensates for the Earth's rotation by slowly moving your camera to match the apparent motion of the stars. This allows for longer exposures without star trailing, and thus lower ISO settings, which reduces digital noise. A recommended model is the SkyWatcher Star Adventurer.

Blue Hour Blends:

Another technique to consider is blending your Milky Way shot with a 'blue hour' shot of your foreground. This method involves photographing the foreground during the blue hour when there's more natural light available, then capturing the stars when fully dark. The two images can then be blended together in post-processing, resulting in a well-lit, less noisy image.

Reducing noise in your Milky Way photos can dramatically improve their quality. By adopting these techniques, you can reveal the stunning details of our galaxy with clarity and precision.

4. Overcoming Light Pollution

Light pollution can be one of the most significant challenges for astrophotography. It's the excessive or misdirected artificial light produced by human settlements that brightens the night sky and obscures your view of the stars. Here's a more detailed and technical guide on how to overcome light pollution in your astrophotography:

Understand Light Pollution:

Firstly, it's essential to understand what light pollution is and how it affects your photography. It's the brightening of the night sky caused by street lights and other man-made sources, which interferes with astronomical observation. This pollution not only impacts the visibility of celestial objects but also affects the contrast and colours in your night sky photos.

Choose the Right Location:

Location selection can be the biggest difference-maker. If possible, get as far away from urban areas as you can. National parks, rural areas, and high altitudes are often good choices. Websites and apps such as the "Light Pollution Map" can help you find areas with lower light pollution.

Shoot during New Moon Phases:

The moon can contribute significantly to light pollution. If possible, plan your shoots during the new moon phase, when the moon is not visible in the night sky, to minimise additional light interference.

Use a Light Pollution Filter:

Light pollution filters are specially designed to block out certain wavelengths of light commonly produced by street lights, while allowing other wavelengths to pass through. A recommended option is the NiSi Natural Night Filter. These filters can help to reduce the effects of light pollution, improving contrast and colour balance.

Correct in Post-processing:

Despite your best efforts, some light pollution may still make it into your photos. You can mitigate this by using image-editing software like Adobe Lightroom or Photoshop. Techniques include adjusting the colour balance to counteract the orange/yellow hue of light pollution, and using graduated filters or adjustment brushes to selectively reduce brightness and enhance contrast in the sky.

Consider Foreground Lighting:

In certain situations, light pollution can be used creatively. The glow on the horizon can add depth to your images when used correctly, particularly if it illuminates an interesting foreground.

Combatting light pollution might feel like a daunting task but using these tips, you can increase your chances of capturing breathtaking, clear images of the Milky Way, even from locations with some degree of light pollution.

5. Fine-Tuning Your Camera Settings

Astrophotography can seem like a daunting task due to the specific camera settings needed for capturing those impressive star-filled shots. Here, we will delve into a more comprehensive guide to fine-tuning your camera settings for Milky Way photography:

Understand the Exposure Triangle:

The Exposure Triangle - aperture, shutter speed, and ISO - is fundamental to photography, and astrophotography is no exception. For Milky Way photography, you typically need a wide aperture (small f-number) to capture as much light as possible, a long shutter speed to allow enough light in, and a higher ISO to increase the sensor's sensitivity to light.

Setting the Aperture:

Wide apertures are generally best for astrophotography, as they allow the most light to reach your camera's sensor. A lens that opens to f/2.8 or even f/1.4 would be ideal.

Choosing the Right Shutter Speed:

The goal is to choose a shutter speed that's long enough to capture sufficient light from the stars, but not so long that it causes visible star trails. A common rule of thumb is the "500 Rule" - divide 500 by your lens's focal length to determine the longest exposure time before star trailing becomes noticeable. However, this rule is a guideline, and experimenting is key.

ISO Settings:

You'll typically use higher ISO settings for Milky Way photography than in other situations, often somewhere between 1600 and 6400. The exact setting will depend on your camera, as different models have different levels of noise at high ISOs.

Manual Focusing:

Lastly, manually focusing your lens at infinity will ensure that the stars appear sharp in your photos. Live view can help with this, as it allows you to digitally zoom in on a bright star and adjust your focus until the star is as small and sharp as possible.

6. Bonus Tip: The Right Gear Matters

Astrophotography is one of those areas of photography where having the right gear can make a significant difference in the quality of your photos.

The Right Camera:

A camera with a large sensor and good high-ISO performance is ideal for astrophotography. Full-frame cameras are often recommended, but many modern APS-C cameras also do a great job.

Fast, Wide-Angle Lens:

A fast, wide-angle lens is crucial for capturing as much of the night sky as possible. A lens with a wide maximum aperture (f/2.8 or better) and a focal length of between 14mm and 24mm is usually ideal.

Sturdy Tripod:

Long exposure times mean a sturdy, reliable tripod is essential. It needs to hold your camera still for several seconds or even minutes at a time. The Sirui Pro Tripod R-2214X Carbon Fiber Professional Tripod is a solid option.

Star Tracker:

A star tracker can be a game changer for astrophotography. By slowly moving your camera to match the apparent motion of the stars, it allows for longer exposures without the stars becoming streaky.

Remote Shutter Release:

A remote shutter release or intervalometer can be beneficial. This device allows you to take photos without physically touching your camera, reducing the risk of camera shake.

Quality Light Pollution Filter:

If you frequently shoot in locations with light pollution, a quality filter like the NiSi Natural Night filter can help reduce the effects of unwanted artificial light.

Choosing the right gear for astrophotography can make your experience smoother and more enjoyable, allowing you to focus more on the art and less on technical difficulties.

5 Tips for Shooting Seascapes

Weather

I think one of the most important things when it comes to shooting seascapes is the weather. The coastlines get smashed with all sorts of weather and it’s a good idea to keep a close watch on it. I love a moody or colourful scene when shooting, but you’re always taking a chance. Depending on what conditions you’re looking for, I suggest going out in all different types of weather. 

Partly cloudy conditions can reward you with lots of gaps on the horizon for the sun to light up the clouds with some colour and give you lots of dynamic range. 

Alternatively, you can roll the dice by going out when it’s raining or mostly cloudy and that’s when the sky absolutely blows up. The only downfall is it’s usually a rare occurrence. There will usually be fewer people too which can be a great relaxing experience!

Tripod 

Having a stable, well-built tripod really makes a difference—especially when shooting anything in the water or in windy conditions. I have been using the Sirui Pro Tripod R-2214X Carbon Fiber Professional Tripod for the last 3 years paired with the K-20II Ball Head. Having a sturdy tripod is important so you can reduce camera shake and prevent losing your camera to the elements. I recently purchased my first professional tripod from Sirui, and I can tell you now, it makes a huge difference. My experience so far is all positive and will have a proper in-depth review coming out at a later date. 

Filters

Filters are really important to get the right exposure dialled in. Before sunrise and after sunset you can get away without using them for long exposures, but when the light gets too strong, you’re going to need some! If you’re shooting anything with a reflective surface, I would use a CPL (polarising filter) to cut through the glare and reveal more detail while increasing the colours slightly. Neutral Density filters act like sunglasses and allow you to use a longer shutter speed. There are many different filters but I mostly use the 3, 6, and 10 stop ND filters. 

I’m a huge fan of NiSi Filters and have been using them for the last couple of years. I’ve tried a few different companies, but none of them come close to the build quality. I would highly recommend them to anyone who is in the market for them. 

Settings

Settings used for seascapes is left to the individual’s needs and wants, so I’ll pick a few variations to break them down. 

Action shots

I would recommend anywhere from 1/500-1/1000 shutter speed to freeze the motion. This can be used for things like waves crashing into cliffs, or capturing unique shapes caused by backwash. 

Detail motion

This is probably one of my favourites and that’s where the shutter speed is considered a long exposure but you can still capture all the details. This usually ranges from about 1/5 of a second to 2 seconds long. This can be great when trying to get leading line shapes of receding water on rocks or the beach. 

Misty look

If you’re striving for this effect, you can do this before sunrise, after sunset, or throw on a 10 stop and leave the shutter open for a few seconds to 30 seconds plus. This will turn the water into a misty cloud-like effect and can be really ethereal. 

Tide

Checking the tide chart could be an important factor when it comes to seascape photography, as the water level can completely change the scene. There could be an interesting rock as a foreground element that catches the waves as it flows back out to sea creating a visually pleasing pattern at low tide. At high tide, it could be completely submerged and not visible. This can also be important when shooting different locations that can be cut off and you could end up stranded on the other side with no way of getting back unless you had a dry bag for your camera gear! This could turn into a really dangerous shoot if you got the conditions wrong!

I run private and group workshops along the South Coast of NSW where I can personally teach you how to take your seascape photography to the next level. I hope you enjoyed the blog and would love to see you out there in the near future! Thank you! 

Antelope Canyon (Upper)

Antelope Canyon is one of the most amazing natural wonders I’ve ever been to, let alone photographed. This place has been on my bucket list ever since I saw the first photo of it. It’s located just outside of Page, in Arizona.

Living in Utah, it wasn’t too far—about a 6.5 hour drive. I put off going there because I wanted light beams and had to do some research and plan around what months they were going to be active. I was meant to go in May/June 2018, but I had to cancel both tours because of adverse weather conditions. I re-booked for July and crossed my fingers! If you’re looking to go, I highly suggest booking in advance! I know too many people who have missed out because they didn’t book. I chose to do the photo tour and it was booked out 4 weeks in advance.

“Antelope’s Spirit”ISO 64 I 21mm I f/11 I 1/13 sec

“Antelope’s Spirit”

ISO 64 I 21mm I f/11 I 1/13 sec

There are many different types of tours you can book, but the main two are the traditional tour or the photography tour. The traditional tour is more for people who want to explore the canyon and costs around $66. The photography tour costs a lot more ($158) and you have about 2 hours with your guide and a small group. Don’t let that time frame fool you, it’s a stressful and fast-paced couple of hours. There is a lot of waiting for groups to pass by and to be cleared out of each section before you get to take your photos.

My experience here was two sided. You’re overwhelmed by the canyon’s beauty, but also stressed and filled with anxiety because you have a time limit and hordes of people going in and out. You must have a DSLR and a full size tripod for the photo tour. The bonus with the photo tour is that your guide will hold off the crowds while you have about 2 minutes to take your photo. When you’re bracketing about 7 shots, it’s not a lot of time especially when some images take up to 25 seconds in certain parts. This is not necessary but I wanted to make sure that I had a few photos from each composition to work with in post.

“Antelope’s Heart”ISO 64 I 24mm I f/11 I 1.3 sec

“Antelope’s Heart”

ISO 64 I 24mm I f/11 I 1.3 sec

I booked the 11 AM - 1 PM photo tour in July, and with clear skies, you’ll get some incredible light beams and reflective light that bounces off the canyon walls. If you’re looking for similar conditions, I would highly recommend booking around these months and time of day for the best potential!

I would suggest bringing some water to keep hydrated, even though it’s a lot cooler inside the canyon. The guides will be throwing sand up into the air to create those amazing light beams, so if your camera isn’t weather sealed or you’re worried, maybe bring a cover for your camera. If you don’t want to spend any money on a cover, just grab a plastic shopping bag. If you’re sensitive to dust, wear a scarf or handkerchief that you can pull over your face while shooting.

“The Guardian”ISO 64 I 14mm I f/11 I 0.4/0.5 sec

“The Guardian”

ISO 64 I 14mm I f/11 I 0.4/0.5 sec

This place can be quite difficult to shoot, especially with the time pressure and the amount of people. I would highly recommend bracketing your exposures, so you can exposure blend them later in post or have multiple images to choose from! I had only been doing photography for about 18 months when I visited, so hopefully some of these tips will help. I have also put the camera settings in the photo captions to give you an idea of what I used. If you got anything out of this little blog, please feel free to let me know! Happy shooting!

Winter In Southern Utah

Day One

On a spontaneous decision, I decided to go down to southern Utah for a photography trip. There was reports of a snow storm that hit the day before and another coming while I was down there. This trip was a little different to most because of the unique weather.

I arrived to a location that I had been wanting to visit for a long time and I was finally there. I got that burst of excitement as I pulled up in my car, got out and started looking around for comps prior to sunset. The weather forecast was to be clear that night and I was pleased because I wanted to shoot a part of the Milky Way that is only visible for a few months of the year. Shooting in these conditions is very difficult but also unique which is why I had the motivation for the trip. As the sun dipped below the horizon, the sky blew up with the light catching the high clouds. I frantically tried to get myself a few different images while the color lasted. By the end of the sunset shoot, I could not feel my hands and could hardly take anymore photos because it was so cold. As I waited for complete darkness, I warmed up in the car and made dinner. I set up my tripod, aligned my tracker to Polaris and was all set for some astro photography in some of the darkest skies in America.

I got a few photos of Pleiades (the Seven Sisters) as I was waiting for Orion to pop up and get into alignment for a shot I had in mind. After getting all my tracked shots, I made my way down to the cliff face where there was a platform I could stand on to take my self-portrait. I set my camera timer and ran down and out to the platform where I stood still for thirty seconds (it felt like a lifetime). As I was standing there I think I got some vertigo, started to feel light headed and that I was dreaming because it was so surreal. After my camera had finished, I return to it to take a series of images to stack for noise reduction. Jumping into my car for a good nights sleep was amazing, minus the cold.

Day Two

I woke up extremely cold and checked the temperature in my car and it said 9F/-13C. There was some incredible ice formations that covered the inside of the car windows. I was so cold I couldn’t stand sticking around for sunrise so I started the car and drove off looking for somewhere to shoot while I got warm. I came across this unique butte and had to pull over. I took a few shots and different compositions until the sun rose enough for me to get the drone out for some potentially cool photos.

Was lucky enough to get some amazing color for sunrise.

Was lucky enough to get some amazing color for sunrise.

Here's a little video of me getting my drone out for the second time. Took some photos of this spot and did some video. I always forget to use my drone when I'm out taking photos but I want to start doing some more!

I headed to Moab to check-in to a hotel because it was just too cold without the appropriate gear. I can tell you now, that shower was bliss! I later caught up with a good friend Joshua Snow (j.snow_photo) where we went and shot the Delicate Arch. Got some nice golden light for sunset. In the morning we shot Dead Horse but we got skunked, so returned for sunset where the clouds broke up enough for the sun and light to come through.

Incredible conditions for an extremely well-known location.

Incredible conditions for an extremely well-known location.

The next day, I returned home to go back to work and get ready for school - reality sucks sometimes. It was an eventful trip and one that I won’t ever forget. If you’ve made it to this point, thank you very much for reading and I hope you enjoyed the blog!